PhotoLab
PhotoLab is a set of tools for digital pictures
PhotoLab has a separated subset for EXIF datas : Photolab-ExifTools
PhotoLab has a separated subset for colorblind peoples: Photolab-ColorblindTools
Version: 4.0.0 changed july 03 2011, author: Raymond Ostertag, License : GNU/GPL
Languages: english and french
Type: Python-fu for Gimp-2, tested with Gimp-2.6.6 under Linux and Windows
Option: Python Imaging Library get it to go faster when handling image sizes
Installation : Download 7zip or tar.gz archives. Each archive contain a text help file en english. The Python-fu must be copied in the user directory at .gimp-2.6/plug-ins. Under Linux and Mac they must be executables.
Translation :
A .pot file is available for translators. Download
gimp20-photolab.pot translate it and send
it back to me in the ![]() Gimpfr mailbox. I'll add it to the supported languages list.
Gimpfr mailbox. I'll add it to the supported languages list.
Download : You can download archives separatly by following the link of the summary below or download all in one in 7zip PhotoLabo-4.0.1.7z or tar.gz format PhotoLabo-4.0.1.tar.gz
BCSbatch
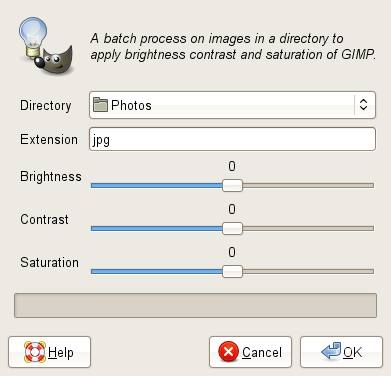 A batch work to adjust Brightness Contrast Saturation.
First you'd better do a test preview on a picture in GIMP. Use the Brightness-Contrast
and Hue-Saturation tools (don't use hue because only saturation is available in the batch process).
Memorise the values you want and apply them with BSCBatch on a set of pictures in a directory.
A batch work to adjust Brightness Contrast Saturation.
First you'd better do a test preview on a picture in GIMP. Use the Brightness-Contrast
and Hue-Saturation tools (don't use hue because only saturation is available in the batch process).
Memorise the values you want and apply them with BSCBatch on a set of pictures in a directory.
Download BCSBatch 7zip BCSBatch tar.gz Menu location: Filters / PhotoLab / Batch corrections / Brightness contrast saturation

CurveBatch
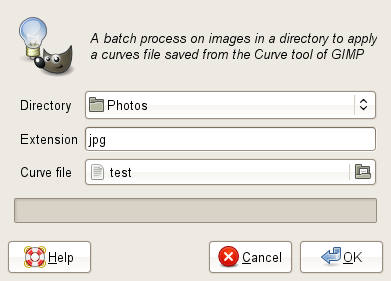 A batch work to apply a curve file saved from the curve tool of GIMP.
First you must do a setting on a picture in GIMP with the curve tool of GIMP and
clic on the Save button. The saved settings not concern only the value channel
but also the red, green and blue channels.
Then launch CurveBatch and apply the saved file on a set of pictures in a directory.
A batch work to apply a curve file saved from the curve tool of GIMP.
First you must do a setting on a picture in GIMP with the curve tool of GIMP and
clic on the Save button. The saved settings not concern only the value channel
but also the red, green and blue channels.
Then launch CurveBatch and apply the saved file on a set of pictures in a directory.
Download CurveBatch 7zip CurveBatch tar.gz Menu location: Filters / PhotoLab / Batch corrections / Curve
LevelBatch
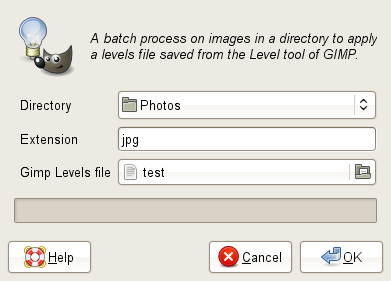 A batch work to apply a lefel file saved from the level tool of GIMP.
First you must do a setting on a picture in GIMP with the level tool of GIMP and
clic on the Save button. The saved settings not concern only the value channel
but also the red, green and blue channels.
Then launch LevelBatch and apply the saved file on a set of pictures in a directory.
A batch work to apply a lefel file saved from the level tool of GIMP.
First you must do a setting on a picture in GIMP with the level tool of GIMP and
clic on the Save button. The saved settings not concern only the value channel
but also the red, green and blue channels.
Then launch LevelBatch and apply the saved file on a set of pictures in a directory.
Download LevelBatch 7zip LevelBatch tar.gz Menu location: Filters / PhotoLab / Batch corrections / Level
FileRename
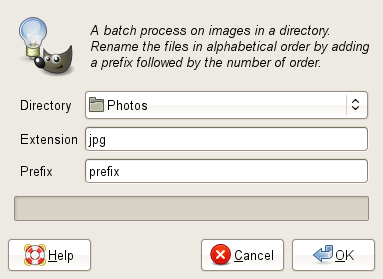 This basic utility is a batch work yo rename et renumber your pictures. It's possible to use a text file
to prefix the name of the pictures. The numbers are given by alphatical order.
For example img_541_en.jpg img_562_en.jpg
will be renamed in MyPhoto_001_en.jpg and MyPhoto_002_en.jpg.
It's better to use this utility before writing the comment file of the two Web gallery Python-fu below
because the line number in the text editor will fit the number given at the picture.
This basic utility is a batch work yo rename et renumber your pictures. It's possible to use a text file
to prefix the name of the pictures. The numbers are given by alphatical order.
For example img_541_en.jpg img_562_en.jpg
will be renamed in MyPhoto_001_en.jpg and MyPhoto_002_en.jpg.
It's better to use this utility before writing the comment file of the two Web gallery Python-fu below
because the line number in the text editor will fit the number given at the picture.
Download Filerename 7zip Filerename tar.gz Menu location: Filters / PhotoLab / Batch works / Rename files
FileResize
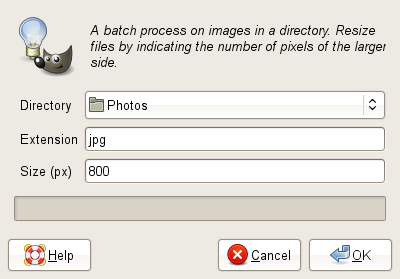 This basic utility is a batch work to resize your pictures. You just set the maximal size of the bigger side in pixels and
all the picture bigger than this value will be resized. It can also resize a XCF GIMP file and also the
layers in the XCF without flatten the image.
This basic utility is a batch work to resize your pictures. You just set the maximal size of the bigger side in pixels and
all the picture bigger than this value will be resized. It can also resize a XCF GIMP file and also the
layers in the XCF without flatten the image.
Download Fileresize 7zip Fileresize tar.gz Menu location: Filters / PhotoLab / Batch works / Images Resize
JpeqQuality
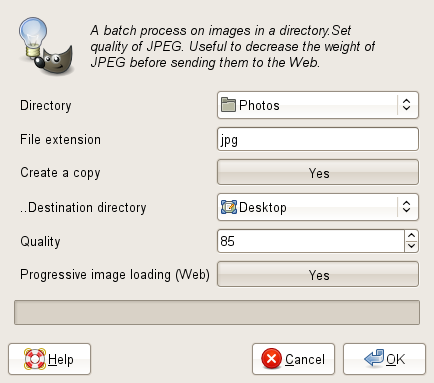 This basic utility is a batch work to increase the compression ratio of your JPEG photos and therefore
reduce the weight of the files without decreasing the number of pixels. It is not always useful to
keep the max JPEG qualilty of your photos if you wish for example put them all on a CD and send them
to your friends.
This basic utility is a batch work to increase the compression ratio of your JPEG photos and therefore
reduce the weight of the files without decreasing the number of pixels. It is not always useful to
keep the max JPEG qualilty of your photos if you wish for example put them all on a CD and send them
to your friends.
Download JpeqQuality 7zip JpeqQuality tar.gz Menu location: Filters / PhotoLab / JPEG Quality and Filters / PhotoLab / Batch works / JPEG Quality
WebGallery
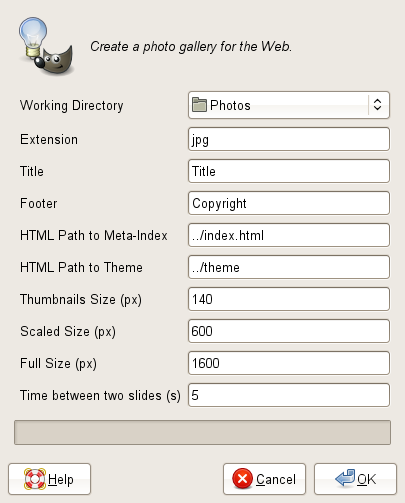 Generate a picture gallery for the Web. An exemple is visible at this Web address
galerie Canada.
It can produce as many Web pages as you need and it's ideal for a medium or
important set of pictures. A slideshow mode is available. You would also be able
to show some picture in full size just by one clic in the resized picture.
The comments are read from a text file. Titles, footer can also be read from a
text file. The HTML files produced are in XHTML+CSS2. A separate CSS2 theme
is downlodable below (you need at least this one).
Generate a picture gallery for the Web. An exemple is visible at this Web address
galerie Canada.
It can produce as many Web pages as you need and it's ideal for a medium or
important set of pictures. A slideshow mode is available. You would also be able
to show some picture in full size just by one clic in the resized picture.
The comments are read from a text file. Titles, footer can also be read from a
text file. The HTML files produced are in XHTML+CSS2. A separate CSS2 theme
is downlodable below (you need at least this one).
Download WebGallery 7zip WebGallery tar.gz Menu location: Filters / PhotoLab / Gallery / Web Gallery
WebImageMenu
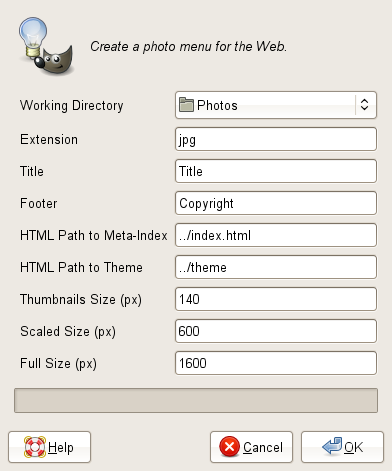 Generate a picture menu or a one page picture gallery for the Web. An
exemple is visible at this Web address
menu Voyages (fr).
The descriptions, titles, footer are read from a text file. If you add a links
text file then you obtain a menu instead a gallery. The HTML files
produced are in XHTML+CSS2. A separate CSS2 theme
is downlodable below (you need at least this one).
Generate a picture menu or a one page picture gallery for the Web. An
exemple is visible at this Web address
menu Voyages (fr).
The descriptions, titles, footer are read from a text file. If you add a links
text file then you obtain a menu instead a gallery. The HTML files
produced are in XHTML+CSS2. A separate CSS2 theme
is downlodable below (you need at least this one).
Download WebImageMenu 7zip WebImageMenu tar.gz Menu location: Filters / PhotoLab / Gallery / Web Image Menu
Theme
This CSS2 them is made for the galleries generated by WebGallery and WebImageMenu. You have to put manually the theme at the right place. It's the Theme HTML Path parameter that set where to put the theme. The default value is ../theme you should in this case have the theme directory as a global theme as the same level as the galleries. Otherwise the simple value theme indicate a theme in each gallery directory, you have to copy all the theme for each new gallery.
Download Theme 7zip Theme tar.gz
DarkEnlight

 >>>
>>>
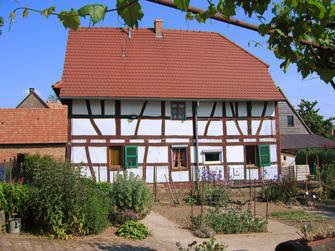
This utility add to your picture a layer in Softlight mode filled in gray with a mask filled with the Value channel of the picture. The resulting effect is that the pixels are more enlighted than they was dark at the beginning. With a fill of gray 50% there is no visible effect but with brighter gray you modify the enlightment of the picture dark tones. Once the Softlight layer made you can still adjust the luminosity with the Brightness-Contrast tool of GIMP. I use this utility when I want see/show more details in the picture dark tones.
Download DarkEnlight 7zip DarkEnlight tar.gz Menu location: Filters / PhotoLab / Enlight the dark tones
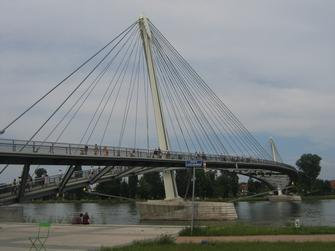
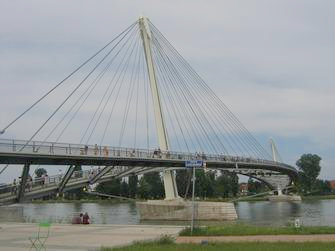
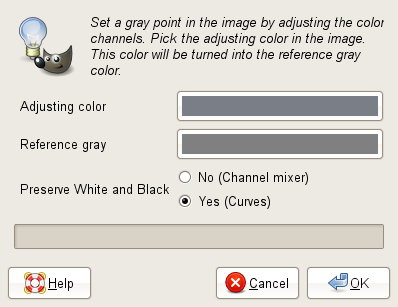
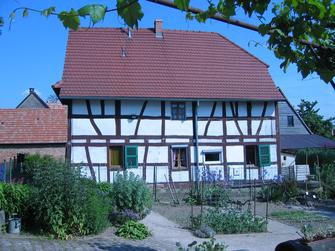
GrayPoint
 >>>
>>>
Un utility to modify the gray point of your photos. It can used as standalone on a single photo or in batch mode on photos located in a directory. The gray point is used to correct the color temperature with a gray chart. There is two differences between a classic gray point, this available from the Level tool of GIMP. The correction is made by difference between two colors. It is not necessary to have a gray color in the image (in case of you don't have a gray chart) or to turn to a gray color and then you can apply a partial temperature color correction only. Finally two methods are available, the first one use the channel mixer and offset in a linear way the color channels thus modifiying all the colors, the second one use the curve tool of GIMP and modify in a non linear way each color channel thus modifiying less the dark and light areas of the photo.
Download GrayPoint 7zip GrayPoint tar.gz Menu location: Filters / PhotoLab / Gray Point and Filters / PhotoLab / Batch works / Gray Point
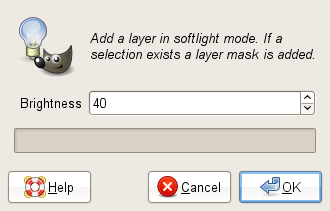
SoftLight
 >>>
>>>
This utility add to your picture a layer in Softlight mode filled in gray. It's useful to correct a bad global enlightment of a photo. Often it's used to add light in a dark photo. With a fill of gray 50% there is no visible effect but with brighter/darker gray you modify the enlightment of all the picture. Once the Softlight layer made you can still adjust the luminosity with the Brightness-Contrast tool of GIMP. If there was a selection at start they will be used to create a layer mask to preserve some parts (for example a sky) of the picture of the global enlightment correction.
Download SoftLight 7zip SoftLight tar.gz Menu location: Filters / PhotoLab / Softlight layer
AddBorder

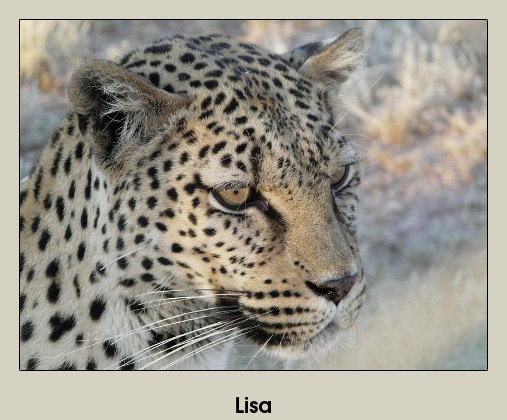
An utility to add a border around a photo. It can used as standalone on a single photo or in batch mode on photos located in a directory. This is a simple border like a polaroid. One can add a title behind the photo.
Download AddBorder 7zip AddBorder tar.gz Menu location: Filters / PhotoLab / Add border and Filters / PhotoLab / Batch works / Add border
MakeWallpaper
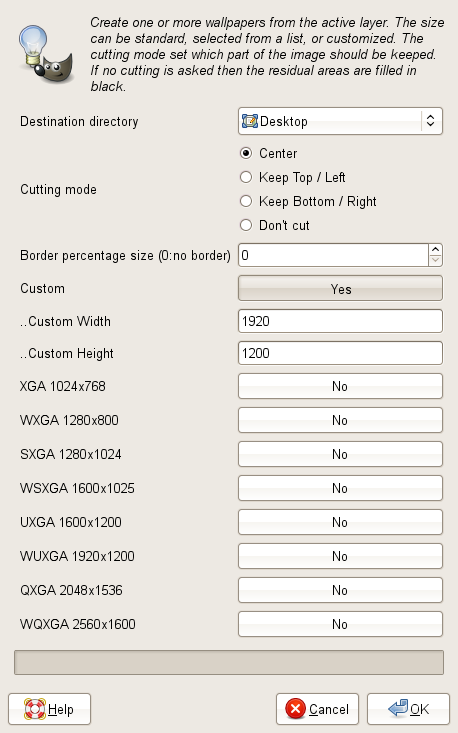 An utility to create one or more wallpapers from a photo. It can used as standalone on a single
photo or in batch mode on photos located in a directory. The numbers of pixels of the photo is
modified to fit the screen definition. The photo is never stretched, thus if the screen and photo
format are not the same you can keep the whole photo and then fill areas with a (black) background
color or you can cut a part of the image (your choice are image centered or cut a side). Many
standard screen definition are available. You can generate a set of wallpaper and share them
on internet.
An utility to create one or more wallpapers from a photo. It can used as standalone on a single
photo or in batch mode on photos located in a directory. The numbers of pixels of the photo is
modified to fit the screen definition. The photo is never stretched, thus if the screen and photo
format are not the same you can keep the whole photo and then fill areas with a (black) background
color or you can cut a part of the image (your choice are image centered or cut a side). Many
standard screen definition are available. You can generate a set of wallpaper and share them
on internet.
Download MakeWallpaper 7zip MakeWallpaper tar.gz Menu location: Filters / PhotoLab / Make Wallpaper and Filters / PhotoLab / Batch works / Make Wallpaper
Patchwork
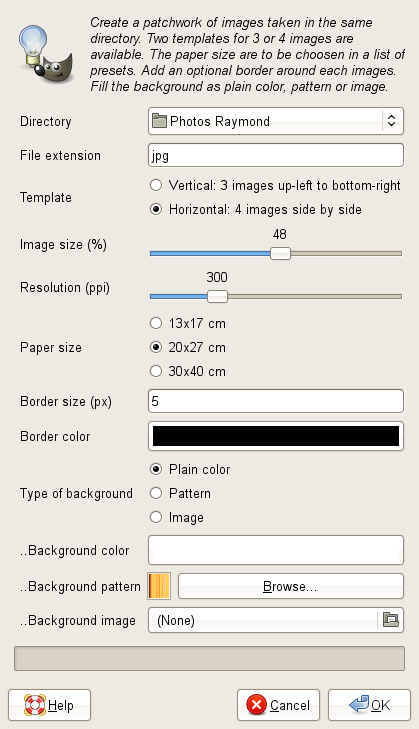
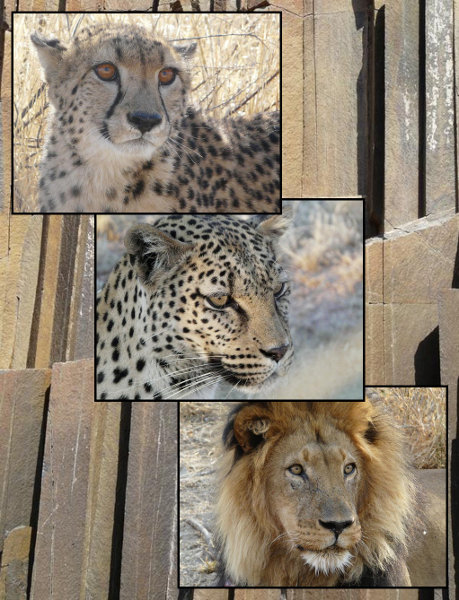
An utility to fill a big size image with a set of 3 or 4 photos. The 3 photos template is a diagonal layout and the 4 photos templates is a 2 lines, 2columns table layout. Several options are available espacialy to fill the background and add borders. The result can be printed like a big photo.
Download Patchwork 7zip Patchwork tar.gz Menu location: Filters / PhotoLab / Batch works / Patchwork
PhotoDuplicate
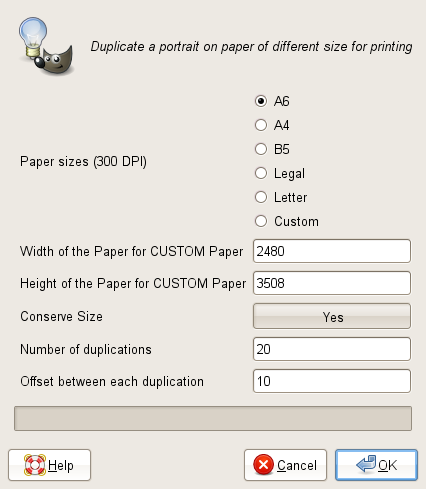 This utility fill a sheet of paper of various size with a picture, often a portrait.
You can choose to keep the original size of the portrait or the number of duplications
you want on the paper. There is paper size presets at 300 DPI.
This utility fill a sheet of paper of various size with a picture, often a portrait.
You can choose to keep the original size of the portrait or the number of duplications
you want on the paper. There is paper size presets at 300 DPI.
Download PhotoDuplicate 7zip PhotoDuplicate tar.gz Menu location: Filters / PhotoLab / Photo duplicate
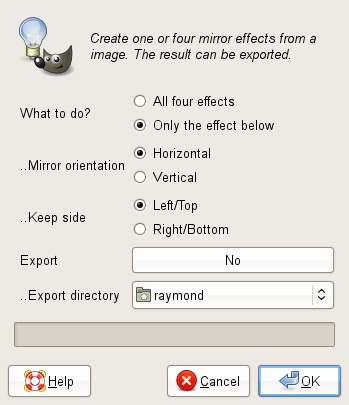
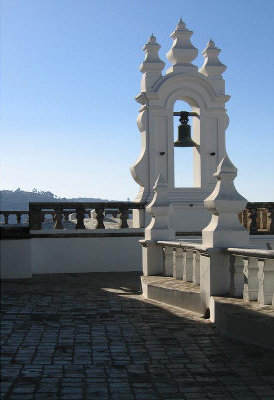
Effect: mirror
 >>>
>>>
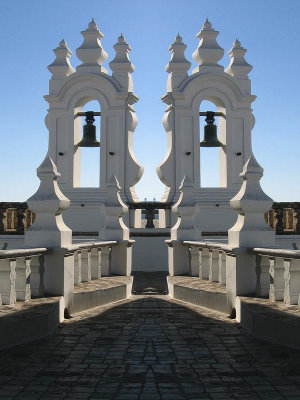
The mirror effect of a photo. It can used as standalone on a single photo or in batch mode on photos located in a directory. Four possibilities are available depending if the mirror is vertical or horizontal and depending of the side of the photo mirrored.
Download Effect: mirror 7zip Effect: mirror tar.gz Menu location: Filters / PhotoLab / Effect: mirror and Filters / PhotoLab / Batch works / Effect: mirror